How create a geolocation module - React Native
The Challenge
Who never needed locate something or be located at some point in their Lives. This post is about how I included geolocation on React projects, not the creepy-stalker type, the cool ones, like find nearest puppies, free hugs tracker, distance to the love of your life.
Geolocation can be used in various forms, the simplest example is to pinpoint the current location of a device, what can be easily achieved by many browsers. But there is more in the location world, a lot more, you can track the user path, do background tracking and create geofences that can be used to send notifications when a user enters or leaves some area.
While react already have a browser based geolocation support that solves most of the simple cases. Sometimes I needed something with more precision and power if you know what I mean.
The modules I found were not good enough, some too green, too generic, others were incomplete or needed payment for full version, EA copycats. So I decided to use my skills to create the perfect solution, at least for me 😄.
The solution
Since Geolocation have many features, we can get lost quickly trying to create a solution that covers all of then on a single shoot. So as the art of war says lets Divide and Conquer.
The first feature will be Location, yes, just get the current Lat/Long, is the simplest one, we can have something on air in no time, making possible have good feed back before creating any major features. This improves the quality and avoid wasting precious time on meaningless features, Fail fast principle!
The Boilerplate
React does not have much information on how create a Module, thinks like folder structure, settings, it is up to you. But looking into existing modules it is possible to understand how it works.
There is this great tool that helps building modules, run these commands to create the boilerplate of a Module:
$ react-native-create-library react-locator
Coll with that we now have the basic files of a working module, it does nothing, bug at least works, #sortof.
├── android
│   ├── build.gradle
│   └── src
│       └── main
│           ├── AndroidManifest.xml
│           └── java
│               └── com
│                   └── reactlibrary
│                       ├── RNReactLocatorModule.java
│                       └── RNReactLocatorPackage.java
├── index.js
├── ios
│   ├── RNReactLocator.h
│   ├── RNReactLocator.m
│   ├── RNReactLocator.podspec
│   ├── RNReactLocator.xcodeproj
│   │   └── project.pbxproj
│   └── RNReactLocator.xcworkspace
│       └── contents.xcworkspacedata
├── package.json
├── README.md
To test the new born module, I created a sample React project and moved the module inside it’s node_modules directory.
$ react-native init test
$ cp -r react-locator test/node_modules/react-locator
After that we can link the module with:
$ cd test
$ react-native link react-locator
This will connect the module with React.
The bridge
Lets create a sample method to check if the bridge betwen Js and Android is working.
The methods that implement our features will be inside the class that extends ReactContextBaseJavaModule :
// react-locator/android/src/main/java/com/reactlibrary/RNReactLocatorModule.java

import com.facebook.react.bridge.ReactMethod;

...

@ReactMethod
public void hi() {
  Toast.makeText(getReactApplicationContext(),
  "Greetings! My lord", Toast.LENGTH_LONG)
  .show();
}
Did you notice the @ReactMethod annotation, it is the one responsible to expose our Java method to Javascript.
Some important notes about bridged methods:
- They always return void
- They are asynchronous
- They only pass values to javascript using callbacks or emitting events
Now lets call the exposed method inside the sample React project:
import Locator from 'react-locator';
...
componentDidMount() {
  Locator.hi();
}
And here is the response:
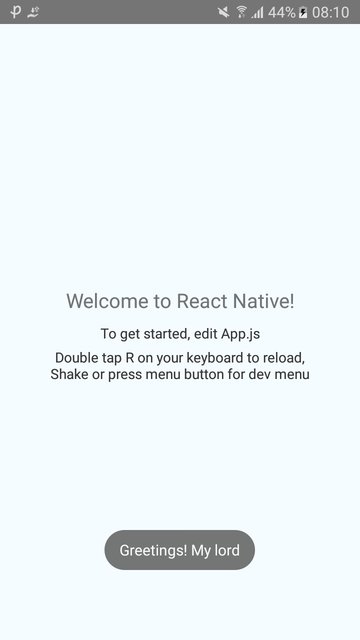
Super great!!! This means that everything is right and we can focus on the main feature now.
Getting the current location
To get the current location of the device we are going to use the Android FusedLocation API, it’s the recommended way to do this, because it can combine multiple sensors and choose the right source in an intelligent and battery-saving way.
So lets remove the hi method from our ReactContextBaseJavaModule and add the getCurrentLocation
// react-locator/android/src/main/java/com/reactlibrary/RNReactLocatorModule.java

@ReactMethod
public void getCurrentLocation(final Promise promise) {
  try {
    this.getLocationClient()
      .getLastLocation()
      .addOnCompleteListener(new OnCompleteListener<Location>() {
        @Override
        public void onComplete(@NonNull Task<Location> task) {
          if (task.isSuccessful() && task.getResult() != null) {
            Location location = task.getResult();
            promise.resolve(LocationMapper.toWriteableMap(location));
          } else {
            promise.reject(TAG, task.getException());
          }
        }
      });
  } catch (Exception ex) {
    promise.reject(TAG, ex.toString());
  }

  private FusedLocationProviderClient getLocationClient() {
    if (locationClient == null) {
      locationClient = LocationServices
        .getFusedLocationProviderClient(getReactApplicationContext());
    }

    return locationClient;
  }
}
As you can see the getCurrentLocation method will get the current location and return the result as a promise.
We need to include Google Play Services to make the google API available:
// react-locator/android/build.gradle

 dependencies {
   ...
   compile 'com.google.android.gms:play-services-location:+'
 }
Now at the React Project:
componentDidMount() {
  Locator.getCurrentLocation()
    .then(location => {
      alert(location.latitude);
    })
    .catch(error => {
      alert(error.message);
    })
 }
Also add the right permissions to the AndroidManifest.xml of the sample project:
<uses-permission android:name="android.permission.ACCESS_FINE_LOCATION"/>
Lets run and see if it works:

IT WOORKS!!!!!
PS. The first time I implemented din’t work, not even the second, like any feature it had compile time errors, missing imports, but let’s just say that it worked. Don’t be frustrated with the errors when implementing your module , they are a pain in the ass, but normal, or be frustrated if works for you.